• Skip to primary navigation
  • Skip to content
  • Skip to primary sidebar
  • Skip to footer
SmartKitchens.Review Logo

Smart Kitchens Review

The Best Kitchen Product & Appliance Reviews

  • HOME
  • Ovens
  • Grills
  • Blenders
  • Cookware
  • BLOG
    • Ovens

How to SEASON a Charcoal Grill EFFECTIVELY?

May 13, 2022 by Callie

Seasoning charcoal is another name for healing or curing. It aids in removing dirty, poisonous substances and pollutants. And the grill chamber provides a strong coating that protects the grill from substantial rust. 

This process takes one to two hours to complete, which can add up to a few years. Simply put, it’s a process of greatly improving its performance and heating and oiling the grill. This is a very important process to cook your meals better and protect your grill from rusting. 

Reasons for Seasoning Charcoal Grill:

  1. To use and save your brand new grill.
  2. To make cleaning and maintaining your grill a breeze.
  3. For importing a better flavor.
  4. To improve your grill operating life
  5. Coat everything

How to Season Your Charcoal in Some Easy Steps?

  • Select the Cooking Area
  • Remove the Grates
  • Brush the Grates
  • Wash and Dry the Grill
  • Oil on Grates
  • Wipe off Excess Oil
  • Apply Oil to Pit and Lid
  • Fired up and Pre-heat the Grill
  • Recoat
  • Cool Down the Grates

Some Additional Tips for Seasoning Charcoal Grill:

  • Proper Area
  • Grill Brush
  • Putting Coal
  • Adjust the Temperature
  • Ash Handling
Guide For how to season a charcoal grill

Reasons to Seasoning Charcoal Grill:

If you are still confused about seasoning a charcoal grill, let’s discuss the reasons for seasoning a charcoal grill.

1. To use and save your Brand New Grill:

With a brand-new charcoal barbecue, you have to deal with a variety of safety and sanitary concerns. To have a better taste for a longer time period, increase the lifespan, and save it from rust, the seasoning can help you a lot. 

2. To Make Cleaning and Maintaining Your Grill a Breeze:

Everyone loves smoked and grilled food. But in undertaking the cooking and post-cooking cleaning chores, few show the same willingness and eagerness they have for consuming a juicy smoked steak. 

People simply put off or change the plan of having a grilled food festival just because of all the effort it takes to cook and clean. By seasoning your charcoal grill repeatedly, you can ensure that using and cleaning it won’t appear to be an enormous task.

Grill grates comprise an iron cast, which is a good heat conductor and residence for a red charcoal flame. However, it has one downside. 

For example, it’s porous. By using this charcoal, again and again, it absorbs fats, oils, and charcoal emissions, which affects the nonstick features, which are more important for delicious food and for cooking well. 

Without it, it does not cook better. Seasoning is the best way to cover and requires its nonstick feature.

3. For Importing the Better Flavor:

One reason grilled foods taste so delicious is their re-seasoning. All the juices and lubricants that drip down the grates, lids, and pits are vaporized by the high heat and get marinated in the grilled item again. 

When you keep your charcoal grills grate greased and lit, it helps your food take on the distinct favor of grilled. And one thing keeps in mind is that affects your health.

4. To Enhance Your Grill Operating Life:

For keeping your grill well, you want to operate your grill many times. When you season your grill regularly, it lasts longer and works better. This shows that you can gain the same uncompromised grilled taste for a long time now, which is good. 

Regular seasoning stops the grating from rusting and keeps it shiny and usable for a long time, so it’s important to do it.

5. Coat Everything:

We prefer to season the entire grill and smoker, rather than just the grates. Dip your brush and coat into the seasoning sauce and coat interior parts, e.g. lid, nuts, and bolts. 

I did not coat the specific parts. It’s necessary to coat everything included in it.

How to season a charcoal grill in Some Easy Steps?

Follow the steps to season your grill effectively.

Step # 01: Select the Cooking Area!

Before starting your seasoning, and it’s crucial to select an appropriate area for grilling. Select an outdoor space that is clean and properly ventilated and then put your grill there. 

Try to avoid seasoning in places that are polluted or have a lot of people, both for your own safety and to make the seasoning process go smoothly.

Even a slightly dusty or polluted area can affect food taste and can cause rust on your grill.

Step # 02: Remove the Grates!

The grating can now be lifted. Sometimes, the grates can be easily removed, but in others, they may be held inside the grill. This means you’ll need to enter your grill to access them. Wear rubber gloves to keep dirt and sharp edges off your hands.

Step # 03: Brush the Grates:

A grill brush is necessary to clean the grates of any food or debris that may have accumulated there after the last time they were used. Grills should be completely cleaned and brushed on both the interior and outside.

If many precipitates remain even after hardly brushing, you can soak the grate for about fifteen minutes in warm soapy water. That will help to remove any continued stuck-on particles.

Step # 04: Wash and Dry the Grill!

After you’ve brushed the grates, wet a sponge and clean them with a cleaner. New grills can be cleaned easily with water. 

Using this step removes any chemical coating used in this manufacturing process. 

When using the used grills, you need dishwashing liquid, which is specially made for washing the grills. And after rinsing the grates, carefully use a towel to dry the grates as well.

Step # 05: Oil On Grates!

For oiling on the grates, use a paper towel or soft-bristled brush on the surface of the grates. You can also lubricate the grates with an oil spray bottle. Use it instead of a paper towel. 

An elevated steam point oil such as canola or grapeseed would be ideal because coal can be burned for up to two hours at a time. 

Step # 06: Wipe off Excess Oil!

It is necessary to clean the extra oil when you use it for oiling the grates because it will drip down the grates and hamper the even coating. 

On high heat, this excessive oil makes the grease catch fire. Therefore, always wipe away spare oil with a towel.

Step # 07: Apply Oil and Pit and Lid!

Applying oil inside the pit and lid thoroughly is necessary and a good step to covering the entire interior of the grill. 

The iron grill’s pores will be pierced by this process, causing it to harden. It also produces a non-sticky glaze that enriches the flavor of food frequently.

Step # 08: Fired up and Preheat the Grill! 

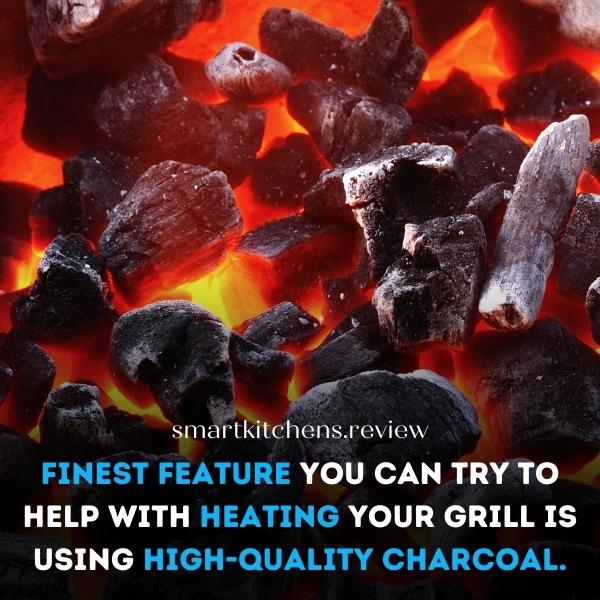
As a result, preheat your grill for 15 minutes and get your grill to a good heat. Add enough briquettes that will keep the grill going for about two hours so that it can start. 

Burn them until the center revolves red, and the outside is covered in gray ash.

Step # 09: Recoat!

Recoating is the final step and once cooled and reapply, the coating. It’s very crucial to repeat it as such an oil cover prevents rusting.

Step # 10: Cool Down the Grates!

After 40 minutes of high heat, you’ll see that your grates’ color changes, from dark bronze for stainless steel to glossy black for cast iron. 

Such signs are perfect for developing a non-slippery surface. As a result, switch off the stove and allow the grate to cool completely.

Filed Under: Charcoal Grill

7 SOLUTIONS If Your Charcoal Grill Not Getting HOT Enough!

May 12, 2022 by Callie

Charcoal grills are the best way to do outdoor cooking. The major problem with the charcoal grill is its heating system. And here we discuss why your charcoal grill not getting hot enough and how we control and handle such problems. 

If you want outstanding outcomes, such as a thriving heating system and a better grilling session, you’ll need a brand of Charcoal like the Weber. And, according to Charcoal’s recommendation, users recommended using fresh Charcoal instead of old Charcoal. 

Listed below are some of the reasons why your charcoal grill isn’t getting hot enough:

Some major causes due to which charcoal grill is not getting hot enough:

  • Your Grill is not Clean 
  • Using of better quality charcoal 
  • Broken Thermometer
  • Clogged air vents 
  • Old charcoal not burn well
  • Still, the lid is open
  • Miscellaneous   

Let’s get deep down into the causes of why a charcoal grill does not get hot enough.

charcoal grill not getting hot enough - solution

7 Reasons Charcoal Grill is Not Getting Hot Enough

Check these recommendations and act accordingly. After applying these, your charcoal grill will start getting heat properly.

1. Your Grill Isn’t Clean:

First, check your grill and clean the ashes from the grill. And keep in mind that this is necessary to clean up because the cleansing of ashes from the grill creates a better heating system. 

If there are ashes in the grill, it stops the heat, and the charcoal does not get hot. 

Using the Weber Charcoal, ashes fall off the burnt coal, which collects in your grill and disturbs the grilling session. You should also check your grill’s ashes and remove them after the previous grilling session. 

weber charcoal grill not getting hot enough

Further, if you placed your grill outside, check if there are any moistures inside of it. Due to moisture, grills take extra time to get heated. So, if there is any moisture, clean it first.

In light of the primary cause of the Charcoal grill failing to heat, it is not appropriate to neat the grill.

2. Uses of better quality Charcoal:

It seems obvious. Low-quality charcoal does not get fired so quickly if it gets to fire, it burns so quickly, which is not suitable for a charcoal grill.

One of the finest features you can try to help with heating your grill is using high-quality charcoal. Charcoal of lower grade can take a long time to warm up, and it will not reach the proper temperature. 

bad charcoal is the reason charcoal grill not hot enough

Using high-quality fuel helps you heat the grill quickly, having a better time cooking.

3. Broken Thermometer:

The thermometer or thermostat on a charcoal grill tells you how warm it is inside the charcoal. It’s imperative to check your thermometer regularly before using it. 

If it’s showing wrong readings, you might think it’s hot enough to cook. If you don’t, you risk undercooking the dish and making it dangerous to eat. And you think the low-end thermometer can still get the job done.

4. Clogged air vents:

Debris and ashes are such things that block the air vents . And first, clean it and then use it. If the borders are littered or the vents are obstructed, the heating will be terrible. Look at each of the vents before grilling to prevent this from happening. 

Why is debris going inside the grill? 

The charcoal, lighter fluid, and food drippings create debris within a charcoal grill. It’s natural, but cleaning both the grill’s outside and the interior keeps it in good shape for grilling.

5. Old Charcoal does not burn well:

Old charcoal reduces the properties of grilling. 

If you are trying to use old charcoal that has already been burned from the previous grilling session, then the result is that the grill is not getting hot enough. 

It would be best if you have to use fresh charcoal each time you grill, and this has more significant results than using old charcoal.

Check: Best Charcoal Grill For Steaks

6. Still, the lid is open:

The grill might not be getting hot because still, the lid is open. 

Many people love to watch and cook food by opening the lid. If you wish to get out of the cap, you’ll have to open it, your grill will not smoke. 

The area above the burner is just for grilling, not the upper area. As a result, charcoal and a charcoal grill with a closed top are recommended for cooking meals quickly.

Only open the grill when you are confident that the food has been cooked. Otherwise, it will waste all the heat that was caught up inside. 

7. Miscellaneous: 

If you’re going to make it on a hot grill, avoid these.

Altitude: Even if you do everything perfectly, if you live at a height of 5,000 feet or above sea level and regularly grill at that elevation, you may have problems igniting a fire. 

At these elevations, the atmosphere loses oxygen, making it difficult to start a fire. Building a charcoal fire at altitude isn’t easy. Our best advice is to manage your dampers open plus your grill clean to enable optimal air movement for the fire.

Frozen Food: If your food is frozen, it will be necessary to keep it at room temperature. If grilling the frozen food from the state is inescapable, the entire grilling time requires a reach out, and additional charcoal may also be required.

Further, when you cook frozen fruit on a charcoal grill, its moisture will fall on the charcoal, which can cause trouble for ignition.

Drip Pans: Drip pans are used to reduce the amount of oxygen. If you’re using a charcoal grill with a drip pan, it reduces the heat inside the grill. 

Expose as much of the cooking surface as possible to encourage air circulation. To avoid going of charcoal departing in the middle of a grilling session, ensure you have a sufficient quantity of charcoal on hand before you start.

FAQs

How do I make my Weber charcoal grill hotter?

By changing the air dampers, the temperature will also change. If more air enters the grill, keep it highly hot, and if less air is extending into the grill, it will cool quickly. 

So, let’s say that more air is moving into the grill so that you will get a hot grill. Most charcoals have two dampers, the first of which is detected at the top of the bowl and is referred to as the lid damper.

Is it true that more charcoal equals more heat?

It is not true all the time. 

If you put a lot of charcoal, it will take time to get burned, which will slow the cooking process. Also, more charcoal means more ash and ash can also slow down the cooking. 

So, we recommend you add the charcoal only according to your needs. 

If you demand to cook at higher temperatures, create a two-fire zone on your grill by putting more charcoal on one flank and less on the other side while grilling at high heat.

Why won’t my charcoal stay lit?

Your charcoal will not burn as long if it is not entirely dry. Because of its natural porousness, charcoal can absorb and retain moisture from its surroundings. 

You should not save your charcoal in a moist place, as such a patio or basement, as it will lose its ability to work up and maintain a fire. 

Why won’t my grill work in the cold?

Grilling may be done in both hot and cold conditions with a few easy adjustments. 

In the winter, to allow your grill sufficient time to toast up, keep the lid closed, and move your meat to a warm pan when it’s done. Compared to high-temperature areas, it takes a little time to warm up.

How can I get my charcoal grill to keep it hotter?

The bottom of a primarily charcoal grill is ready or equipped with vents. In order to gain more air and a hotter fire, you should open the vents in every direction. 

If you blocked the vents, less air came in and started the fire. When you want to use charcoal, primarily check the grill to see the vents open.

Conclusion

Too much ash, moisture, and low-quality charcoal are common reasons if a charcoal grill not getting hot enough.

To gain more heat, keep clean your charcoal grill and use fresh and high-quality charcoal. It is also a best practice that you won’t open the lid more often.

It is also recommended to clean the grill after each use. It will make your grill last longer and save your time when you are using it next time.

Filed Under: Charcoal Grill

Does A Toaster Oven Cook Faster Than A Conventional Oven??

February 4, 2022 by Callie

If you have been curious to know does a toaster oven cooks meals faster than a conventional oven, you’re in the right post. There is always controversy about which oven cooks faster, particularly when comparing a traditional oven with a toaster oven.

Although both toaster and conventional ovens have the same cooking features, their heating methods and cooking time are somewhat different.

Remember that the oven cooking time also relies on how well you preheat it. For this, you can also check my complete preheating guide for beginners HERE .

This article will clear all of your doubts about one of the most controversial questions, “Does a toaster oven cook faster than the conventional oven?” Let’s start!

Does A Toaster Oven Cook Faster Than A Conventional Oven

Does A Toaster Oven Cook Faster Than A Conventional Oven?

Yes, a high-quality toaster oven cooks anything 25% faster than a full-size conventional oven. In fact, toaster ovens are energy-efficient and have better controls than conventional ovens to some extent.

Generally, the smaller variety of the conventional oven is also a toaster oven in many regards. Both ovens work similarly, but typically, a toaster oven heats up quickly and cooks food more quickly.

Want to know why it is that?

Here are some reasons why a toaster oven cooks food quicker than a conventional oven, even though they are similar in many regards.

Size Of Oven:

The first thing that matters most in cooking time is size. Since toaster ovens are usually smaller versions of conventional models and take less time to preheat, which is the main reason for reducing the cooking time of the toaster oven.

In addition, this type of oven features a heating element pretty close to the pan, which is why food temperature rises faster in a small toaster oven than in a large-size counterpart because food is nearer to the heating element.

Convection Heating Vs. Conventional Heating:

Toaster ovens are usually convection ovens, and convection heating burns hotter, faster, and evenly than conventional heating. In addition, convection toaster ovens have a fan, but conventional ovens lack this feature.

A convection fan circulates hot air more efficiently inside the oven, usually leading to faster, even, and thorough cooking without cold spots thanks to heat reaching the food more efficiently.

Preheating Time:

Since toaster ovens are a limited version of conventional ovens and usually come with a convection heating method, this reduces the preheating time. That means you have to spend a briefer time in your kitchen to do the cooking.

For example, a usual preheating time for a toaster oven is approximately 5 to 10 minutes, but a conventional electric oven typically takes 15 to 20 minutes for preheating. One can easily bake six cookies in the toaster oven within the traditional oven preheating time.

That is why you can finish your cooking faster than a conventional oven.

Worth checking: How to clean inside of toaster oven?

Frequently Asked Questions

Is a toaster oven better than a conventional oven?

Yes, a toaster oven is a better option in many regards.

However, the most significant benefit of operating a toaster oven is that these versatile ovens take a shorter cooking time. Besides shorter cooking time, some additional benefits make it better than conventional ovens.

Energy-Efficient:

Toaster ovens are more energy-efficient, which means these ovens use less electricity than traditional ovens. As a result, the toaster oven has maximum power wattage between 1250 watts to 1500 watts.

In contrast, most electric conventional ovens have power wattage between 2000 watts to 5000 watts.

Accordingly, cooking food in the most energy-efficient toaster oven can save 50% of electric energy used to prepare the same food in a conventional oven.

Faster Preheating:

Because the toaster ovens are smaller, it reaches the needed temperature in less time than a conventional one. Indeed it is one of the best advantages of a toaster oven over a traditional oven.

As I mentioned above, the toaster oven takes 5 to 10 to preheat at the maximum temperature, whereas a conventional electric oven takes 15 to 20 minutes to finish preheating process.

Toaster Ovens Are Affordable:

The moderate expense of a small-sized toaster oven starts from 25$, and the average cost for a standard-sized toaster oven ranges between 200$ to 500$.

In comparison, the average price of a standard-sized traditional oven ranges between 500$ to 2000$ or above.

In addition, the toaster ovens don’t need installation, which means you don’t have to spend extra bucks to install your oven in the kitchen. However, conventional ovens require professional installation that costs extra.

Even Cooking Without Flipping Food:

Another perk of using is you don’t have to flip food between cooking. That’s because convection toaster ovens come with a fan to disperse warm air that effectively surrounds your food for even cooking.

Because conventional models don’t have a fan to spread hot air inside the oven, thus in conventional type ovens, it’s common to flip food in the middle of cooking to get the food cooked evenly.

Can a toaster oven replace a full-size regular oven?

Yes, the toaster oven is handy, versatile, and can replace a full-size regular oven. In fact, toaster ovens have better controls and cook food faster than their full-size counterpart—and its decent size is perfect for preparing small batches of freshly baked goods.

But when it comes to weighing the difference between a regular oven and a toaster oven, the only notable difference is the fan. Unlike standard ovens, the conventional toaster oven features a fan that spreads even heat inside the oven, making it faster and more efficient for even cooking.

Can you bake a cake in a toaster oven?

Yes, you can utilize your toaster oven for baking a cake somewhat of your full-size appliance; however, baking more miniature cakes in toaster ovens is always suggested. Plus, you have to manage a few things while baking a cake in your toaster oven.

Here’s what you need to consider while baking the cake in it.

Always start baking cake after preheating your oven.

Toaster oven baking temperature and time vary from conventional ovens, so, adjust it accordingly.

Check and ensure the cake is not too close to the heating element.

Check your cake after every few minutes to get an evenly baked cake.

Is it safe to use aluminium foil in the toaster oven?

Yes, using aluminium foil in the toaster oven is safe until the manufacturer allows it in the instruction manual. If your model allows it, you may require to follow some safety precautions to put foil in your oven safely. Here are the most necessary safety precautions you must need to consider while putting aluminium foil in the toaster oven.

Cut the foil appropriately to the size of your oven so that it doesn’t come in contact with the walls, metal, ceiling, and heating element of your toaster oven.

Don’t cover the food entirely, nor the crumb tray and oven racks.

Replace the aluminium foil after every time you cook.

Never use a foil with oily foods.

Avoid using it if your oven isn’t aluminium foil safe.

Filed Under: Ovens

How to know when toaster oven is preheated? (Guide!) – SK

January 29, 2022 by Callie

“How to know when toaster oven is done preheating?” this is often questioned by some toaster oven users, especially those who have recently purchased the toaster oven.

Toaster ovens are one of the handiest, multi-functional kitchen appliances to utilize in cooking a variety of dishes. However, it’s always necessary for users to know the concept and process of preheating before using it.

Typically, preheating the oven to the preferred warmth or knowing when to put the food in it is one of the initial steps to know while using a toaster oven.

Let’s get straight to the point and understand some possible ways how to know when the toaster oven is preheated?

Related: How to clean inside of toaster oven? (7 Easy Steps!)

How to know when toaster oven is preheated? (Guide!) - SK

Visual Signals:

Many modern toaster ovens arrive with a digital display or indicator lights that let users understand when it is preheated and ready to be used.

Some modern digital toaster ovens constantly display preheating process on smart LCD screens. These smart screens display the temperature rise till the preferred temperature is gained.

Other models have preheating indicator lights next to temperature selection control to indicate the oven is reached at the set temperature. These indicator lights will shut off or turn on when the toaster oven gets the right temperature.

These visual signals are the simplest way to determine if the toaster oven has preheated or not. If you have had a modern toaster oven with such digital displays or indicator lights, all you need is to concentrate on visual clues to ensure the preheating process is completed

Beeping Alerts:

Most modern toaster ovens are built with an alarm. Usually, this audible alarm or beep sound works as an indicator while preheating.

If your toaster oven includes this feature, you will likely hear short and low beeps when you set the timer, or you open the door within the preheating cycle. These short beeping tones are not preheating alarms.

Long and a bit high pitch beeping tone is actually the sound you might hear when it’s done preheating cycle. This method is vividly used to decide if the toaster oven is done preheating.

Oven Thermometer:

If you haven’t a trendy toaster oven with a display screen or beeping feature, in that case, the other effective option is to invest in a toaster oven thermometer that can easily withstand high temperatures.

Place the thermometer inside the toaster oven before preheating. I recommend you place it just close to the glass door to easily read the accurate temperature throughout the oven’s window.

This process is a bit daunting since it requires your constant attention to see if the toaster oven reaches your desired temperature or not.

Consider The Time:

Different models come with various methods and modern features to determine when preheating process is completed. Some toaster ovens are modern, whereas others are traditional and older, but they all perform similar functions.

However, if the toaster oven you have doesn’t include any of the above three indicator features or accessories, don’t worry! You still have an option to know when it ends preheating. Here you may need to consider time.

Fortunately, many recipes mention specific times and temperatures to heat-up the toaster oven. But you can also set the usual preheating temperature for an electric toaster oven which ranges between 350°F to 400°F.

For your consideration, an electric toaster oven takes approximately 10 minutes to preheat at 350°F. Plus, if you desire to preheat it to 400°F, you can give it five extra minutes (around 15 minutes total).

To do this, all you need to do is have a timer to note the preheating time, and when the selected time elapses, you are ready to put your meal in your toaster oven.

FAQs

Is it essential to preheat your toaster oven?

Preheating a toaster oven is highly needed, but sometimes it isn’t necessary. Typically, preheating process depends on the food you want to cook.

For example, preheating is not required when toasting bread, bagels, or reheating food, but it must be preheated to the preferred temperature when baking cake or roasting meat and other dishes.

The easiest and best way to understand whether it is necessary to heat-up the toaster oven is by checking if the recipe allows it since most recipes mention preheating time and temperature.

Can I place food in the toaster oven while preheating?

It is not suggested to put food in the toaster oven while preheating unless the recipe allows it. Putting food in oven before it’s heated earlier to set temperature increases its cooking time, resulting in unevenly cooked food.

Placing the food inside the cold toaster oven can also affect the texture and browning of baked, roasted, or broiled food due to a slower and longer cooking process.

How do you preheat the toaster oven step by step?

Heating up the toaster oven is much easier than standard large-sized ovens. Following are the three easy steps that will let you know how to preheat your toaster oven properly.

  1. The very early step is to set the toaster oven to the preferred temperature mentioned in the recipe. If not mentioned, alternatively, you can adjust it to the usual preferred initial heating temperature that is 350°F to 400°F.
  2. Another step is to ensure your toaster oven door is correctly shut. It would be best to do this before preheating to prevent the loss of hot air from oven to the outside.
  3. The final step is to set the timer. Most recipes include the exact preheating time required for the desired temperature. However, if it is not noted in whatever you’re cooking, set your toaster oven to preheat and wait for about 10 to 15 minutes. Once you have done preheating, put your food inside, and let it cook!

Filed Under: Ovens

How to clean inside of toaster oven? (7 Easy Steps!)

January 7, 2022 by Callie

Toaster ovens are the best alternatives to full-sized ovens that we routinely use for multi-tasking. They are the handiest kitchen appliance for cooking smaller meals, toasting bread, and versatile for reheating food.

However, do you know, if you don’t properly clean the toaster oven regularly, it accumulates the crumbs, grease, and other food residues inside of it, which can dry out over time and can catch fire! 

Furthermore, these leftover particles later result in an unpleasant burnt taste and food poisoning that might be dangerous for your health.

Cleaning the toaster oven from the inside is not as difficult as it may seem. Just like cleaning your standard oven regularly, you should thoroughly clean the inside of the toaster oven at least once a week to keep it in tip-top condition and to avoid any food buildup. 

Read on to learn how to clean inside of toaster oven with expert-approved simple steps. 

How to clean inside of toaster oven - 7 Easy Steps To Follow

Related: BREVILLE BOV900BSS Review

What supplies will you need to clean the toaster oven?

You don’t need fancy intense cleaners or abrasive sponges that may damage your toaster oven sparkling finish. 

Instead, you can make a homemade mixture with the present items in your kitchen. Here’s what you’ll need:

  • Dish soap
  • Warm water
  • Vinegar
  • Dry cleaning cloths 
  • Dishtowel
  • Baking soda
  • Toaster cleaning brush
  • Soft sponge(Non-scratching)

1. Unplug & Let it Cool Down:

Unplug your toaster oven from the power source for safety reasons to begin cleaning. Avoid doing any cleaning if it is plugged in or on. If you do so, it may cause serious problems.

If you have used it before, let it cool down. If your toaster oven is hot and you try to clean it, it may burn you or cause some pain.

2. Remove All Parts & Wash Them in Soapy Water:

Carefully remove all trays and racks. 

After that, fill your sink with warm water, add a little liquid dish soap to it, and then place all the removed parts into the soapy mixture to soak. Submerge these pieces in a warm soapy mixture for at least 15 to 20 minutes and scrub with a brush to come over any stuck food. 

However, in case of serious splatters and toughest stains on these removable parts, experts recommend leaving them in soapy water to soak overnight. Leave trays and racks to air dry once you have finished washing them. 

While you wait for the parts to get soaked and dry, you can continue cleaning the rest of the toaster oven.

3. Brush & Wipe Crumbs Out of Toaster Oven:

Clear all the crumbs from the toaster oven using a dry cleaning cloth. Then you can use any small pastry brush or toaster cleaning brush to wipe out any food residue or crumbs stuck in hard-to-reach corners and top of the toaster oven.

Make sure you remove all the crumbs or other small particles from the toaster oven.

4. Thoroughly Clean The Interior of Your Toaster Oven:

It is the most important step (requires little extra attention) while cleaning a toaster oven. Follow the steps below to wash the interior of a toaster oven effectively.

  • Mix 1 tablespoon of dish soap and 2 tablespoons of vinegar in ½ cup warm water.
  • Dip a smooth sponge in the mixture and thoroughly clean the inside and corners with a damp sponge.
  • Be careful not to wet the heating elements of the toaster oven when cleaning the bottom side.
  • Please avoid using any abrasive sponge, as it will badly impact the non-stick layer of your toaster oven.

5. Wipe Down The Heating Element:

After cleaning the interior of the toaster oven, gently clean the heating elements using a cleaning cloth or dish towel. 

Ensure the cleaning cloth or dish towel is fully dry, not damp. If you accidentally wet heating elements, dry them gently with a dry cleaning cloth. 

Remember that it is necessary to wisely clean the heating elements to maintain your toaster’s toasting quality.

6. Clean The Glass Door of Your Toaster Oven:

Cleaning the toaster oven’s glass door from the inside is challenging. After all, every stain and food splatter while cooking spread in the toaster oven, especially inside the glass door. 

Avoid using harsh window cleaning sprays to maintain the shine of the glass door. 

Instead, make your own mixtures with the items you already have: vinegar & baking soda. These are non-toxic cleaning agents and the best alternatives to harsh chemical cleaning products.

  • Simply add ½ cup of baking soda, 1/4 cup of vinegar (4 tablespoons=1/4 cup), and mix them with water in a small bowl to create a paste. 
  • Don’t add too much water, as the paste may become too runny and tough to handle.
  • Apply the paste to glass inside the door and leave it there for around 10 to 15 minutes.
  • After 15 minutes, use a damp sponge or cloth to wipe the paste away.
  • Use a few squirts of dishwashing soap on a damp sponge or cloth to give a sparkling finish to the glass.

7. Reassemble Your Toaster Oven:

When you have cleaned your toaster oven’s inside and other parts, make sure each part is dry. 

I recommend thoroughly drying all cleaned parts with a dry cleaning cloth before assembling back your toaster oven. 

Once your toaster is thoroughly cleaned and dry, reassemble its parts and plug it back in, and be confident to enjoy your next toasting session with no grime or burnt taste!

How to keep the inside of the toaster oven clean?

It’s easy to keep the inside of the toaster oven clean when you follow a few maintenance tips routinely:

  • After each use, wipe down all the food residue and crumbs out of the toaster oven to prevent any food buildup inside your toaster that could provoke a fire and burnt taste if not cleaned on time.
  • Deep clean your toaster once a week for long-lasting performance (follow the seven steps mentioned above for deep cleaning).
  • Please avoid using any harsh chemical cleaners unless the manufacturer suggests them.
  • Please avoid using a hard-bristle brush or scratchy sponge when scrubbing to keep your appliance’s finish at its best.
  • Always use a toaster cleaning brush or non-scratching sponge to eliminate the food buildup.

How often should you clean the inside of your toaster oven?

If you use it daily for cooking, reheating, and toasting, a bit of maintenance is necessary to wipe out crumbs, grease, and other food residues after each use. As for deep cleaning, you should deep clean each part of the toaster oven once a week if you are a daily user. 

However, for average use, or if you use it only for toasting bread, you should simply clean it after a few uses, like when you often clean other kitchen appliances. 

In addition to gently cleaning the toaster oven after a few uses, you should also do a deep clean once a month if you don’t use your toaster oven daily.

Filed Under: Blog

  • « Previous Page
  • Page 1
  • Page 2

RECENT GUIDES

  • Can You Use Charcoal in An Electric Grill or Smoker? Yes, but how?
  • Do you LEAVE The Grill Open When Lighting Charcoal?
  • Best Air Fryer For Vegans Reviews in 2023 [Top 7 Picks]
  • 05 The Best 5 Burner Gas Grills in 2023 | 5 Burner Gas Grill Reviews
  • Best Blender For Vegans & Vegetarians Nov. 2022 – Expert Reviews
  • How to Break in a New Charcoal Grill? 5 Real Tips!
  • Can you use wood pellets in a charcoal grill? (Guide)
  • WHY Won’t My Charcoal Stay Lit? (8 Reasons & Solutions)
  • How to SEASON a Charcoal Grill EFFECTIVELY?
  • 7 SOLUTIONS If Your Charcoal Grill Not Getting HOT Enough!

IN-DEPTH PRODUCT REVIEWS

BREVILLE BOV900BSS

BREVILLE BOV900BSS

Buy NowRead Review

SmartKitchens.Review - Footer Logo

Our team is here to provide the best information regarding smart kitchens. We keep it easy so that everyone can implement it.
Please note: we don't review any kitchen service or investment plan.

Recent Posts

  • Can You Use Charcoal in An Electric Grill or Smoker? Yes, but how?
  • Do you LEAVE The Grill Open When Lighting Charcoal?
  • Best Air Fryer For Vegans Reviews in 2023 [Top 7 Picks]

Still confused while setting up your kitchen? Let's discuss it up.

info@smartkitchens.review

  • Facebook
  • Pinterest
  • CONTACT
  • ABOUT
  • TERMS
  • PRIVACY POLICY
  • AFFILIATE DISCLOSURE

Copyright © 2025 · Aspire Pro on Genesis Framework · WordPress · Log in

  • HOME
  • Ovens
  • Grills
  • Blenders
  • Cookware
  • BLOG
    • Ovens